14. WooCommerce-specific features
◀ Contents · Not connected yet? See Connect your shop.
WooCommerce is the store on your own WordPress website. Inkica connects straight to it: orders flow in automatically, tracking is sent back to your customer, and you can publish Inkica products to your store in a few clicks.
Before you connect
- Your website runs on https (a padlock in the browser).
- WooCommerce 5.8 or newer.
- In WordPress, Settings → Permalinks is not set to Plain.
- You sign in to WordPress with an Administrator (or Shop manager) account.
Connect your store
- Go to Shops → Connect shop → choose WooCommerce.
- Enter your store address (e.g.
mystore.com, ormystore.com/shopif WordPress lives in a sub-folder) → click Connect WooCommerce. - You’re taken to your own WordPress admin — sign in if asked, then click Approve to give Inkica Read/Write access.
- Your store sends you back to Inkica — the shop is connected. The shop name is taken from your website’s name.
Right after connecting, Inkica pulls in your paid orders from the last 14 days (older ones you have usually shipped already). From then on, new orders arrive almost instantly.
No plugin is needed. When you click Approve, WooCommerce creates an API key named Inkica — you can see or revoke it under WooCommerce → Settings → Advanced → REST API. If you revoke it, the shop in Inkica shows as disconnected and you get a notification; reconnect to use it again.
How WooCommerce orders work
- Only orders in Processing (paid) come into Inkica. Pending payment / On hold orders (e.g. an unconfirmed bank transfer) come in once they move to Processing. Besides instant delivery, Inkica also re-checks every 30 minutes, so no order is missed.
- Cash on delivery (COD) orders don’t come into Inkica — the customer hasn’t paid yet and Inkica’s carriers don’t collect cash.
- Bundles bring in only the real products inside, not the bundle’s own line.
- The order number in Inkica matches the one in WordPress (even with an order-numbering plugin), and you can search orders by it.
- Size/color come from the product’s variation attributes (e.g. Size: L). Fields your customer fills in such as Personalization / Name / Custom text are sent to the factory as personalization.
- Your customer’s note (the Order notes box at checkout) shows on the order details and is not sent to the factory.
- Products without a SKU still work — Inkica recognizes them by variation; map the SKU once for future orders.
- Tracking goes back to your store automatically. When the factory hands the parcel to the carrier, Inkica adds a note to customer (WooCommerce emails it to the customer) with the carrier, tracking number and a tracking link, then marks the order Completed.
- Orders cancelled in WooCommerce can no longer be sent to a factory. If the order was already sent, contact the operations team.
Orders Inkica splits into several parcels: each parcel adds its own tracking note, and the order is marked Completed when the last parcel ships.
Publish products to WooCommerce
In My products → open a product → List to marketplaces, tick your WooCommerce shop (together with eBay/Etsy/TikTok Shop if you like), then click Publish.
- Inkica creates a variable product (Size/Color) with the retail price you set for each variant in Variants & pricing, plus the mockup photos. Your store downloads the photos itself, so this can take about a minute.
- By default the product is saved as a Draft so you can review it in WordPress. Turn on Publish WooCommerce products live immediately to publish right away.
- No category is needed — the new product has none; file it in WordPress yourself.
- Each variant gets a SKU like
IUSG5000-S-BLACK-P123that is already mapped — orders for this product match automatically, no manual mapping. Don’t change these SKUs in WordPress. - Inkica doesn’t manage stock — the product is always in stock.
Manage store products (Listings tab)
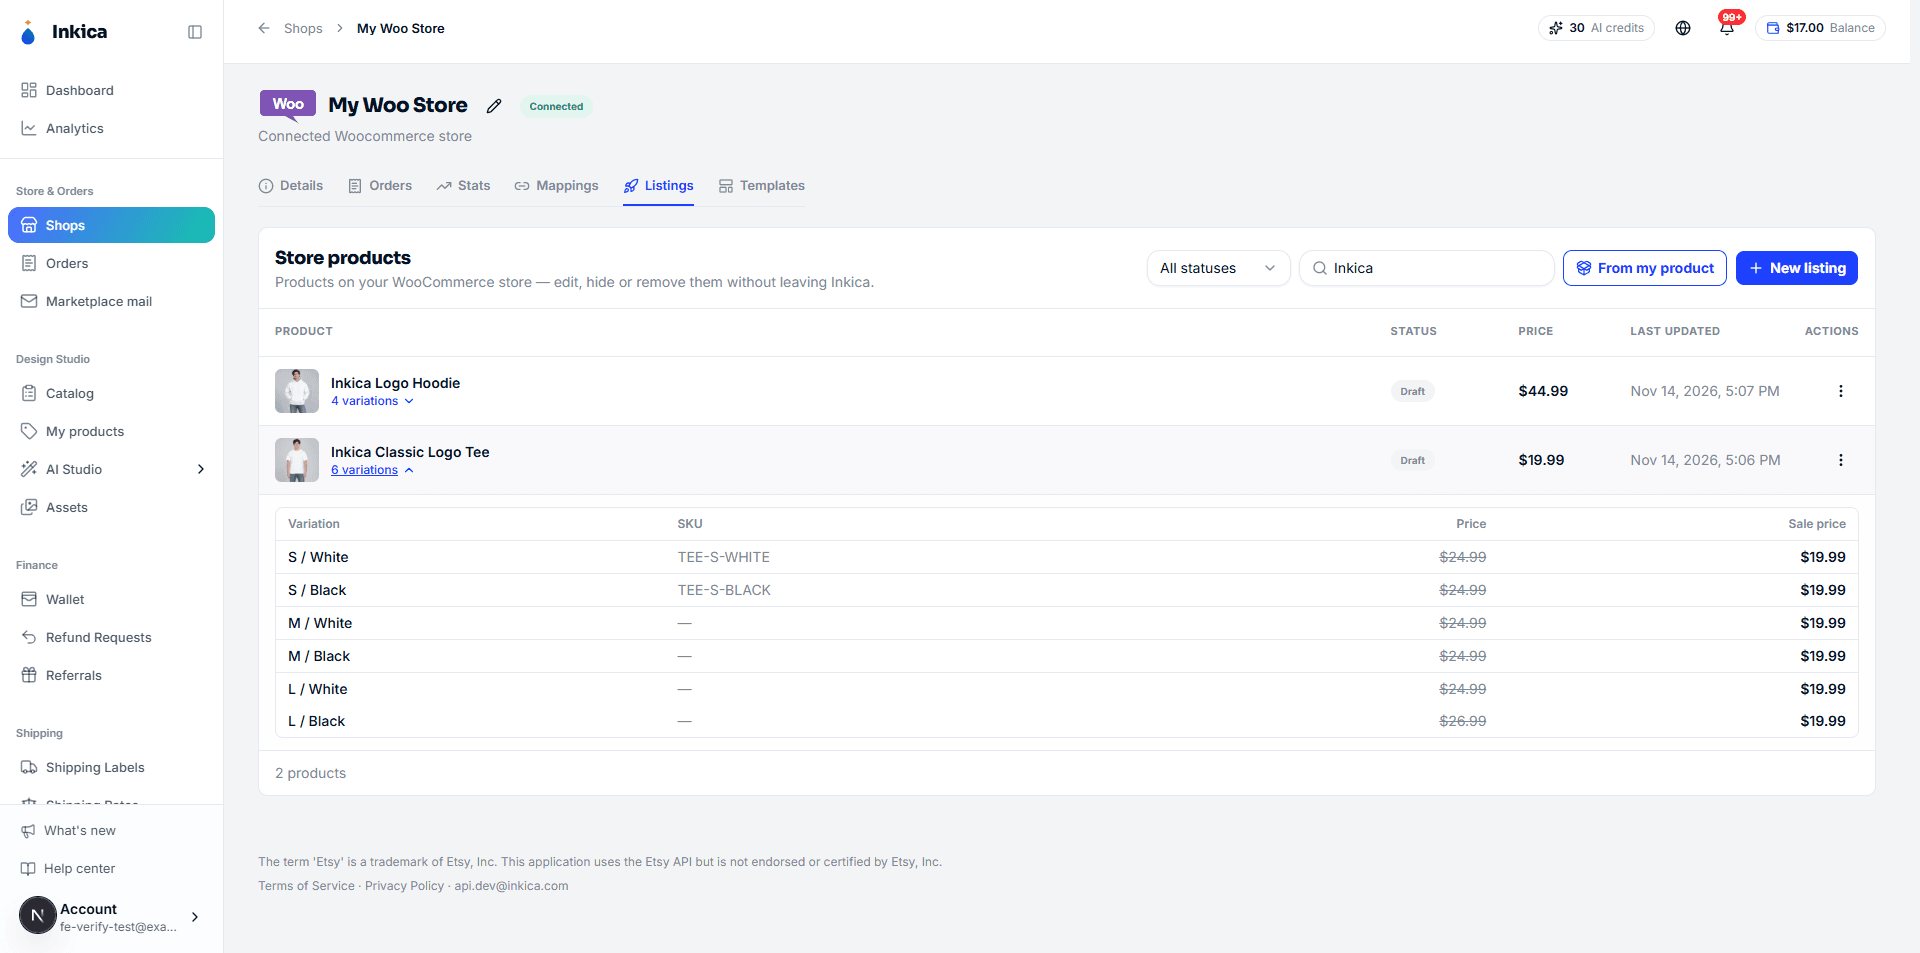
Go to Shops → open your WooCommerce shop → Listings tab to see every product on your store, read live from WooCommerce (including products you created in WordPress). Search by name or SKU, filter Published / Draft; click N variations under a product name to see the price, sale price and SKU of each variation right in the list.
Create a listing
Two ways:
- New listing — fill everything in yourself (or start from a template), like the eBay/Etsy/TikTok Shop listing forms.
- From my product — publish one of your My products; its SKUs are mapped automatically, so orders match on their own.
New listing
-
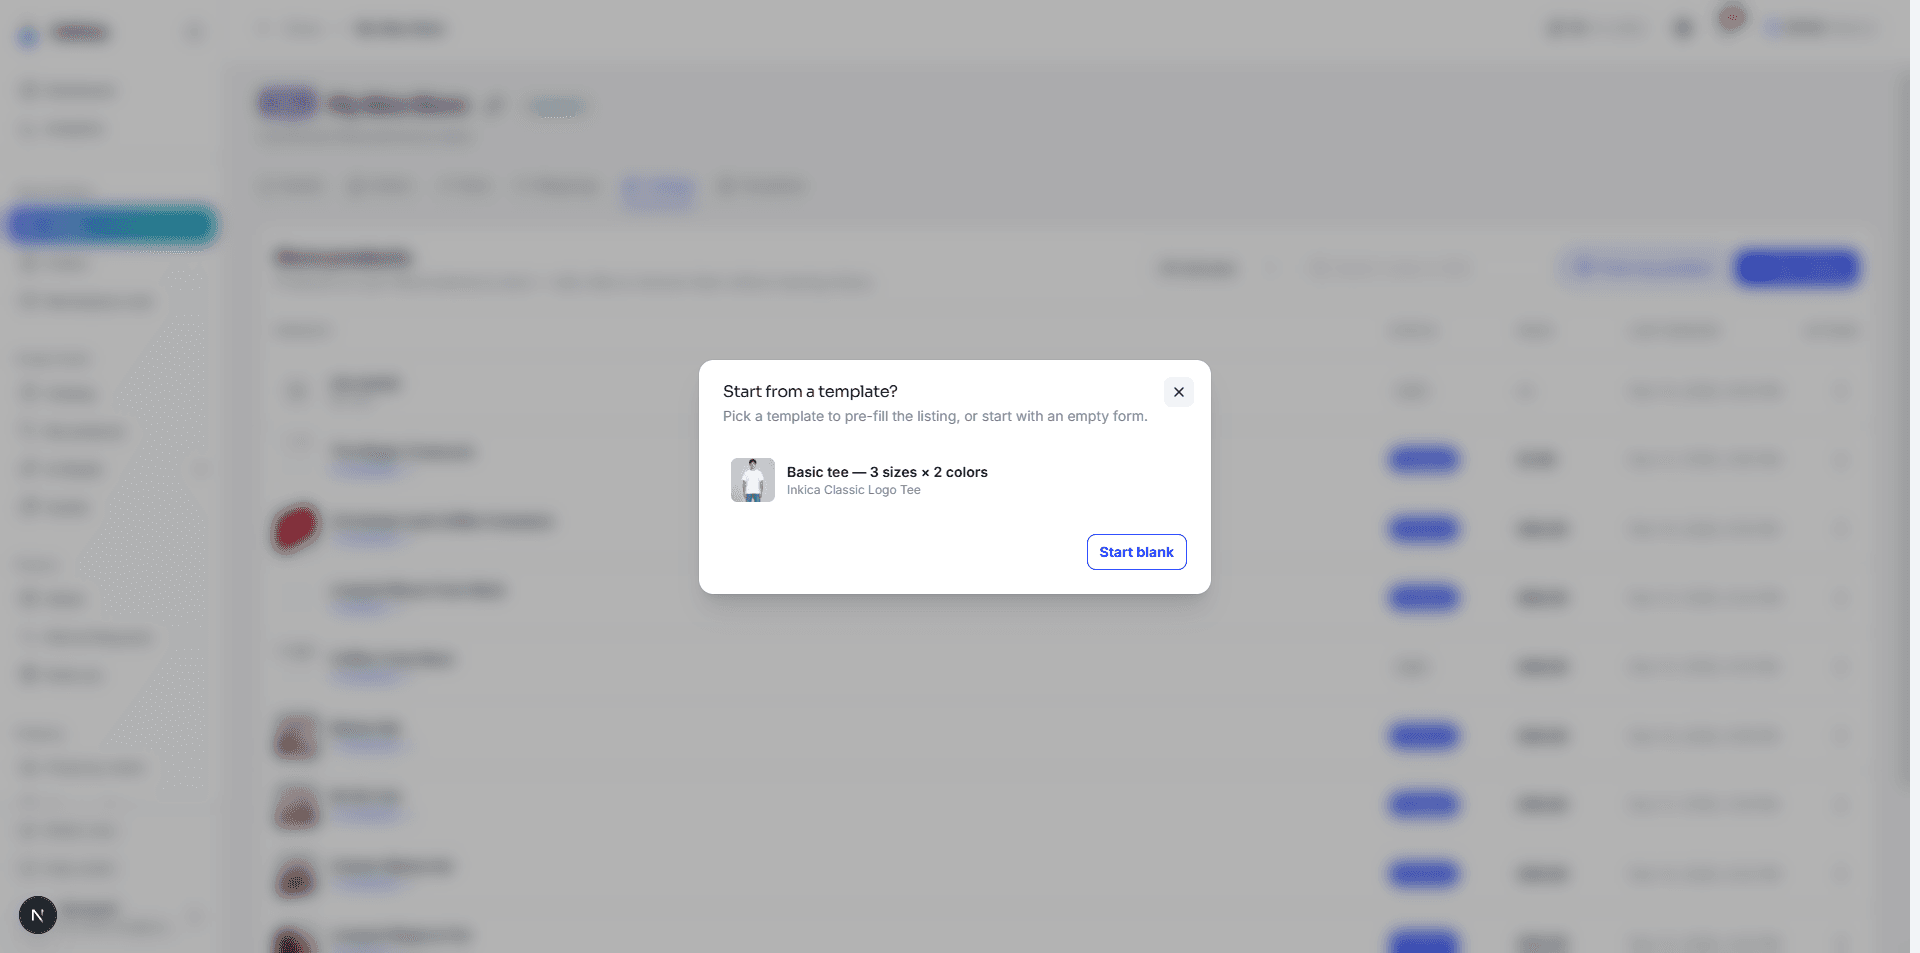
Click New listing. If you have templates, pick one to pre-fill the form, or Start blank.
-
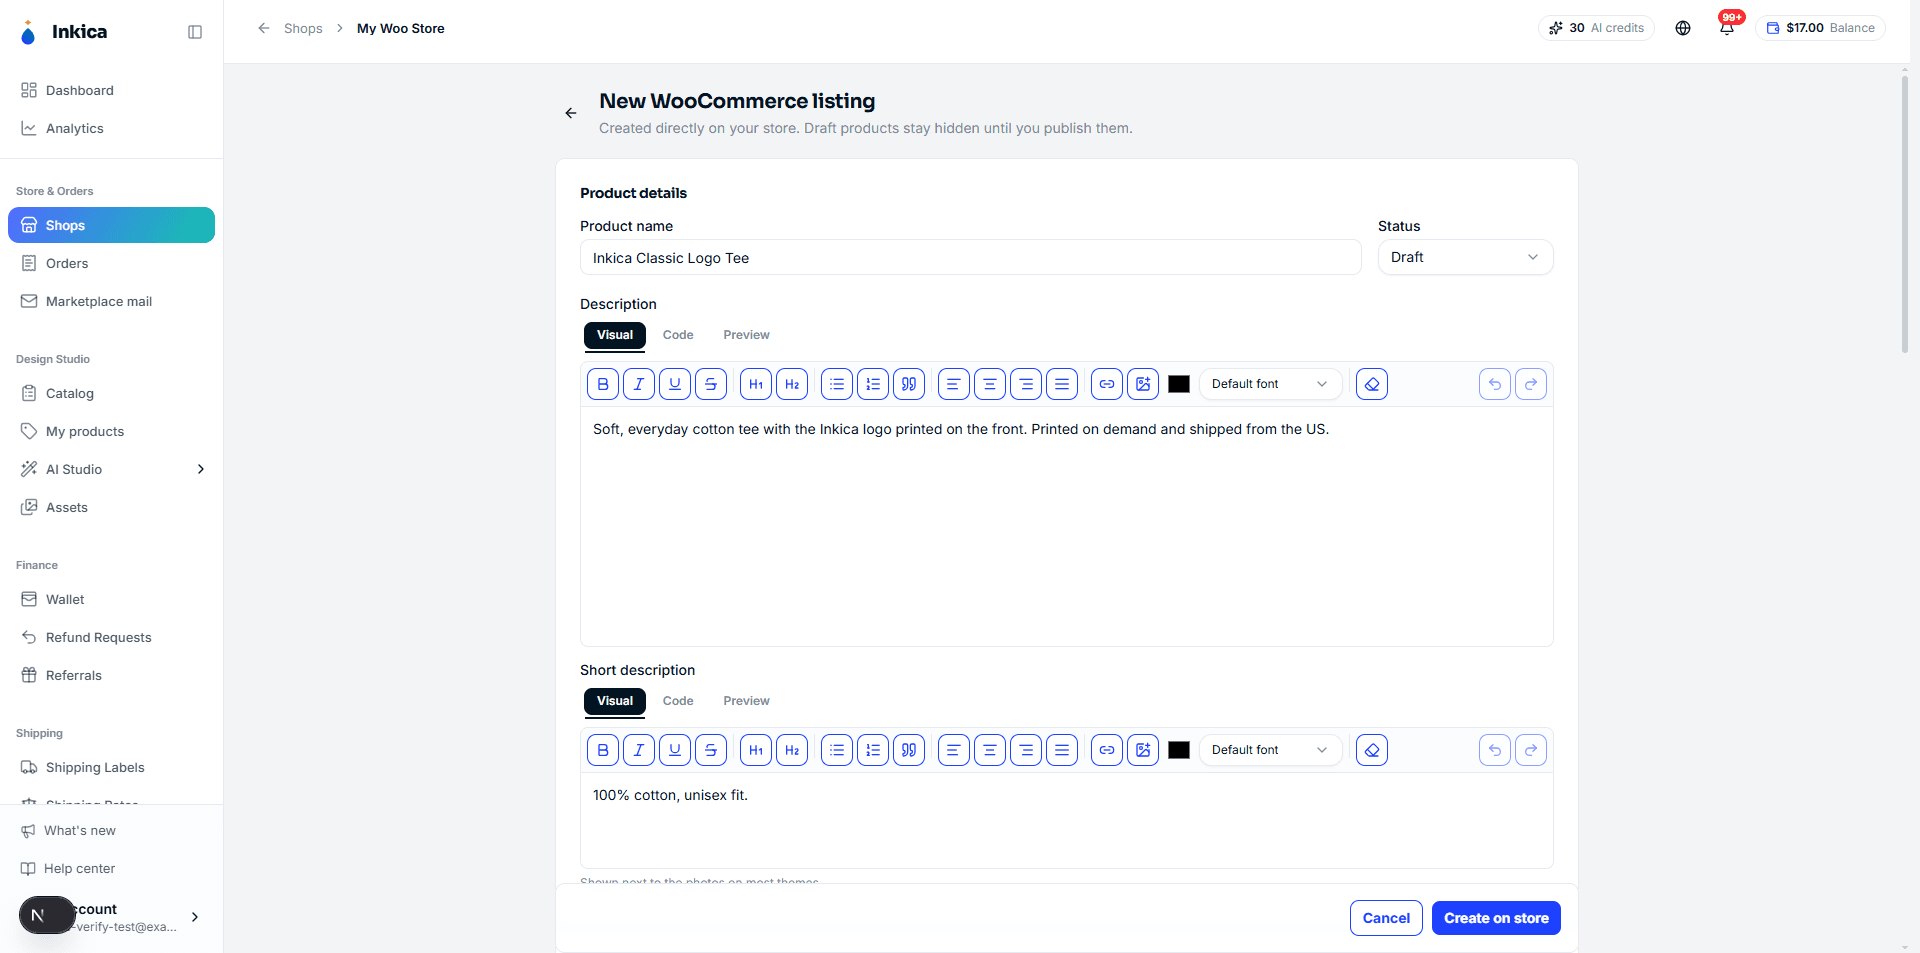
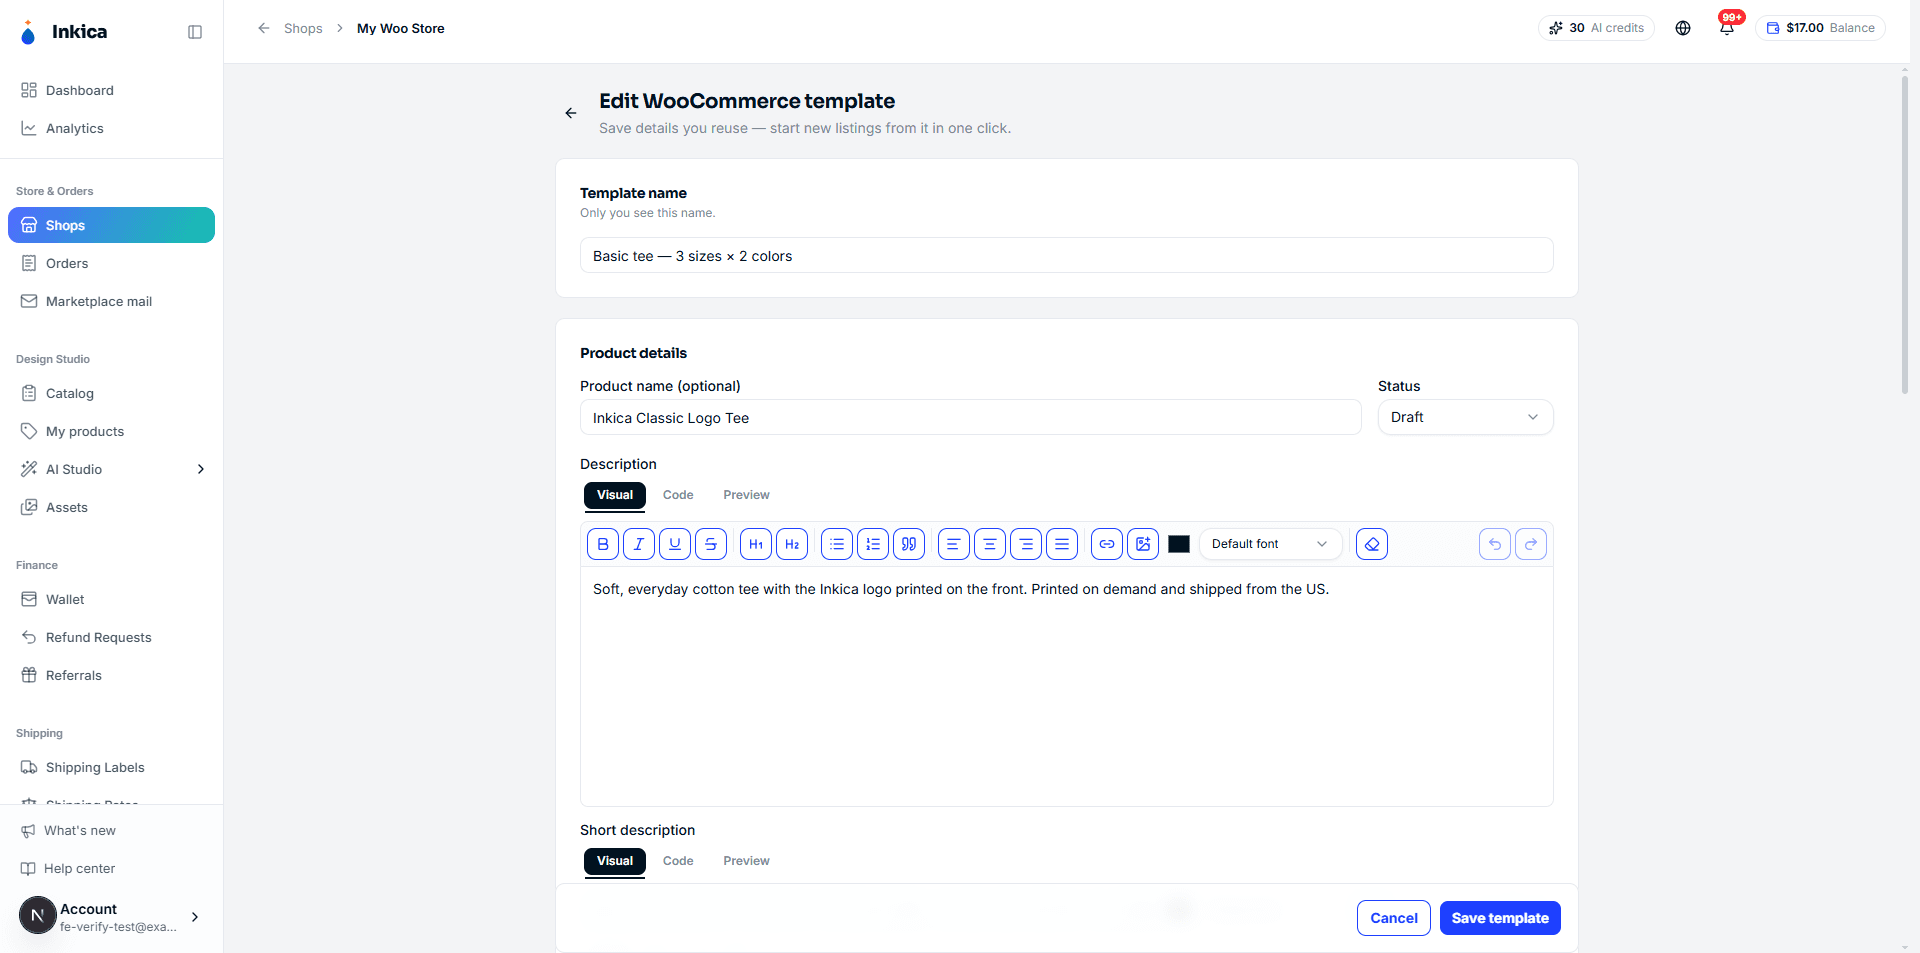
Product details: name, status (Draft keeps it hidden until you publish), description and short description. The description has a formatting toolbar (bold, headings, lists, links, images…); the Code tab takes HTML, Preview shows the result.
-
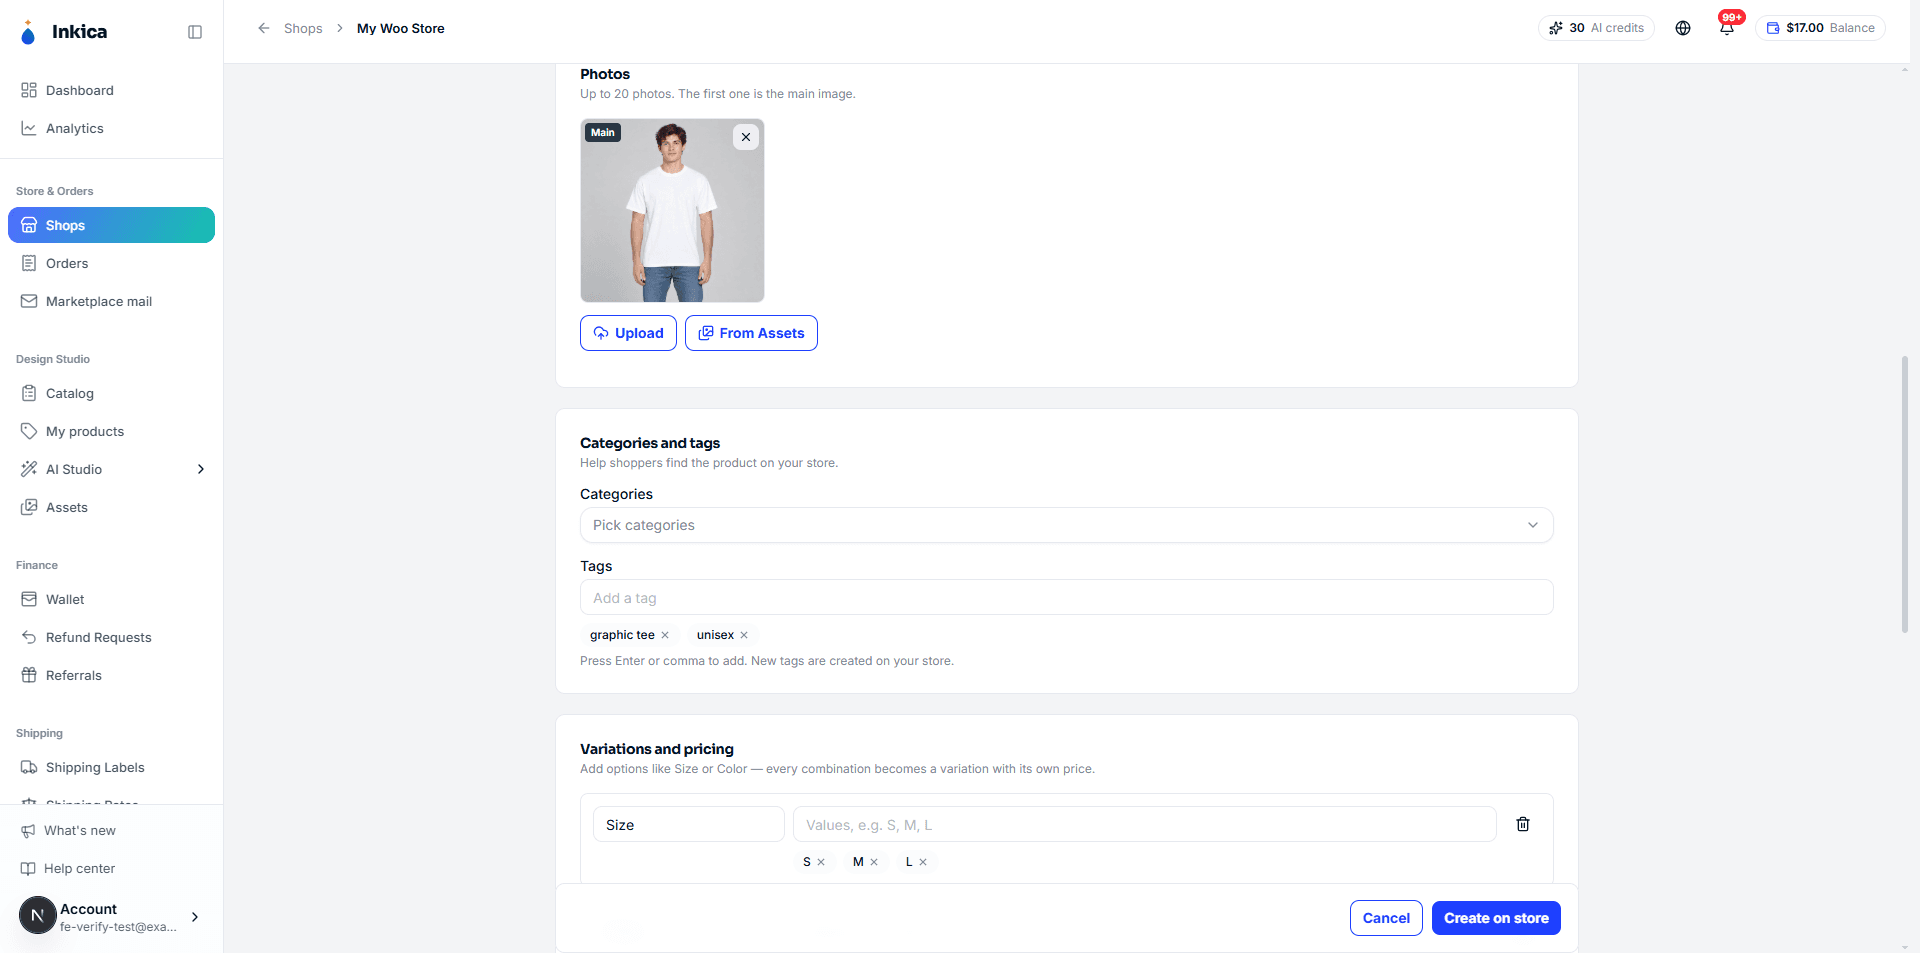
Photos: drag photos in, click Upload, or pick From Assets. The first photo is the main image — click ★ on another photo to change it. Categories and tags: pick your store’s categories; type a tag and press Enter (new tags are created on your store).
-
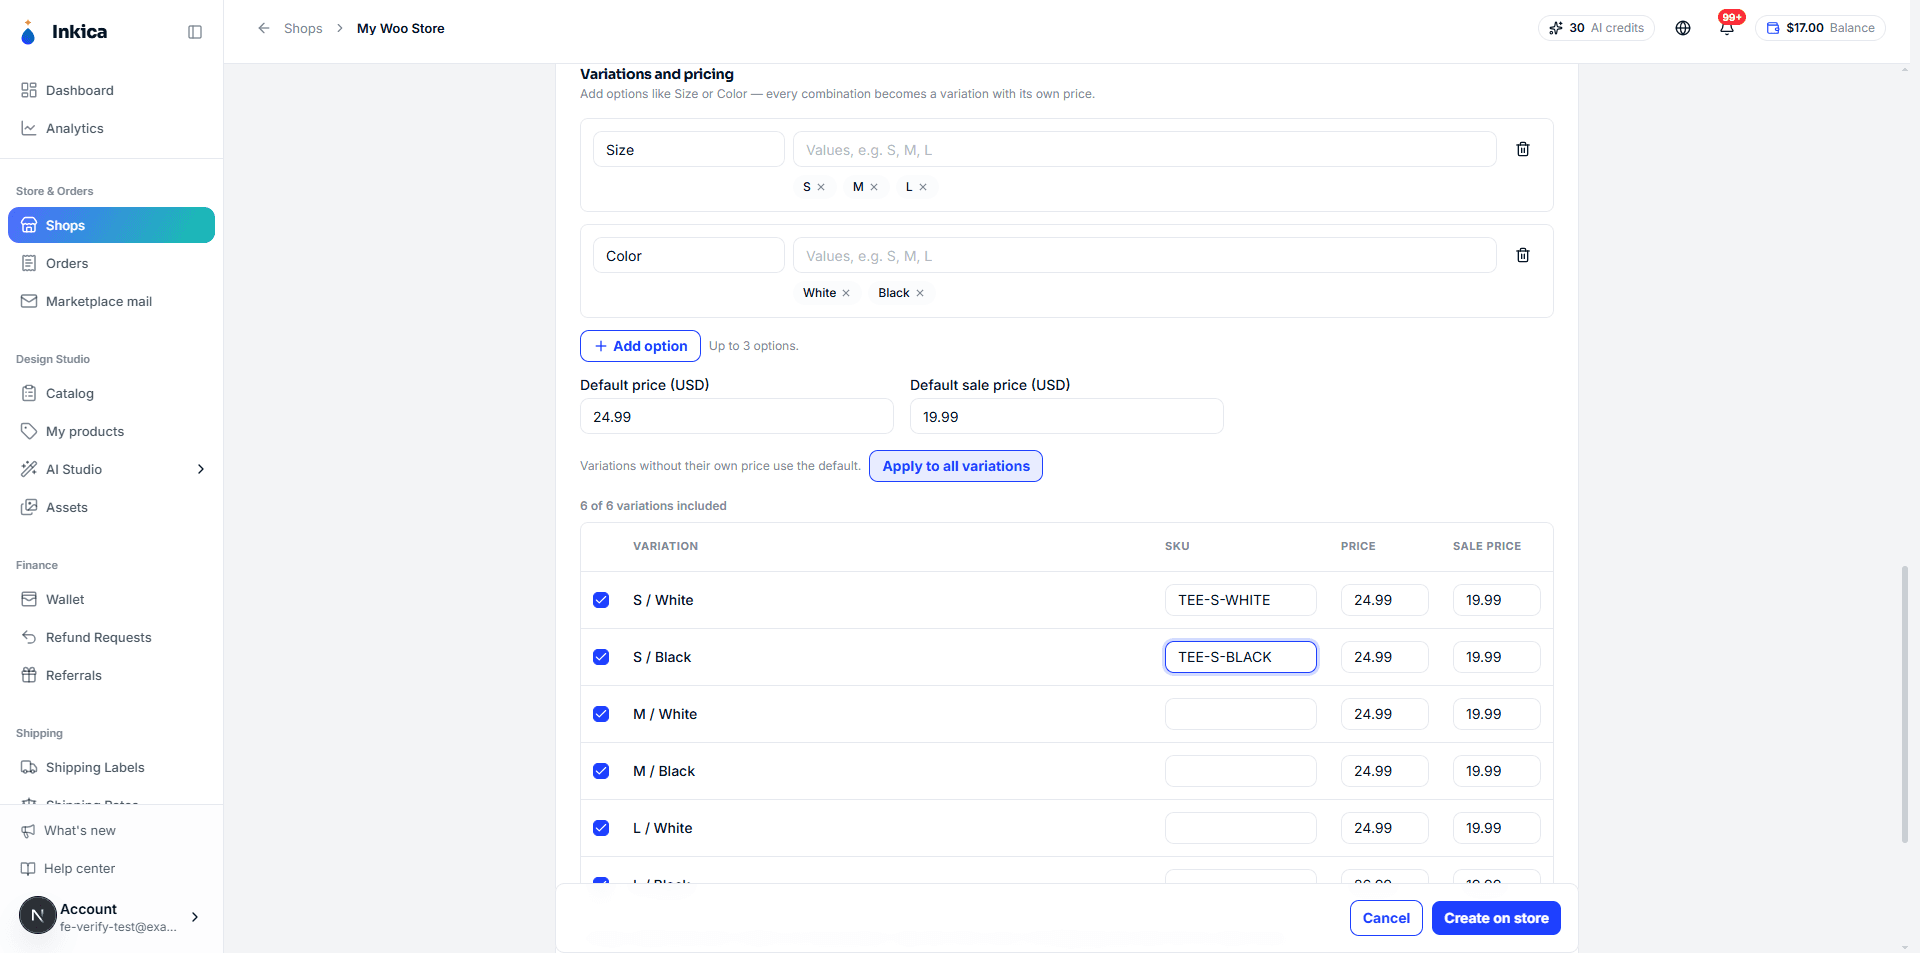
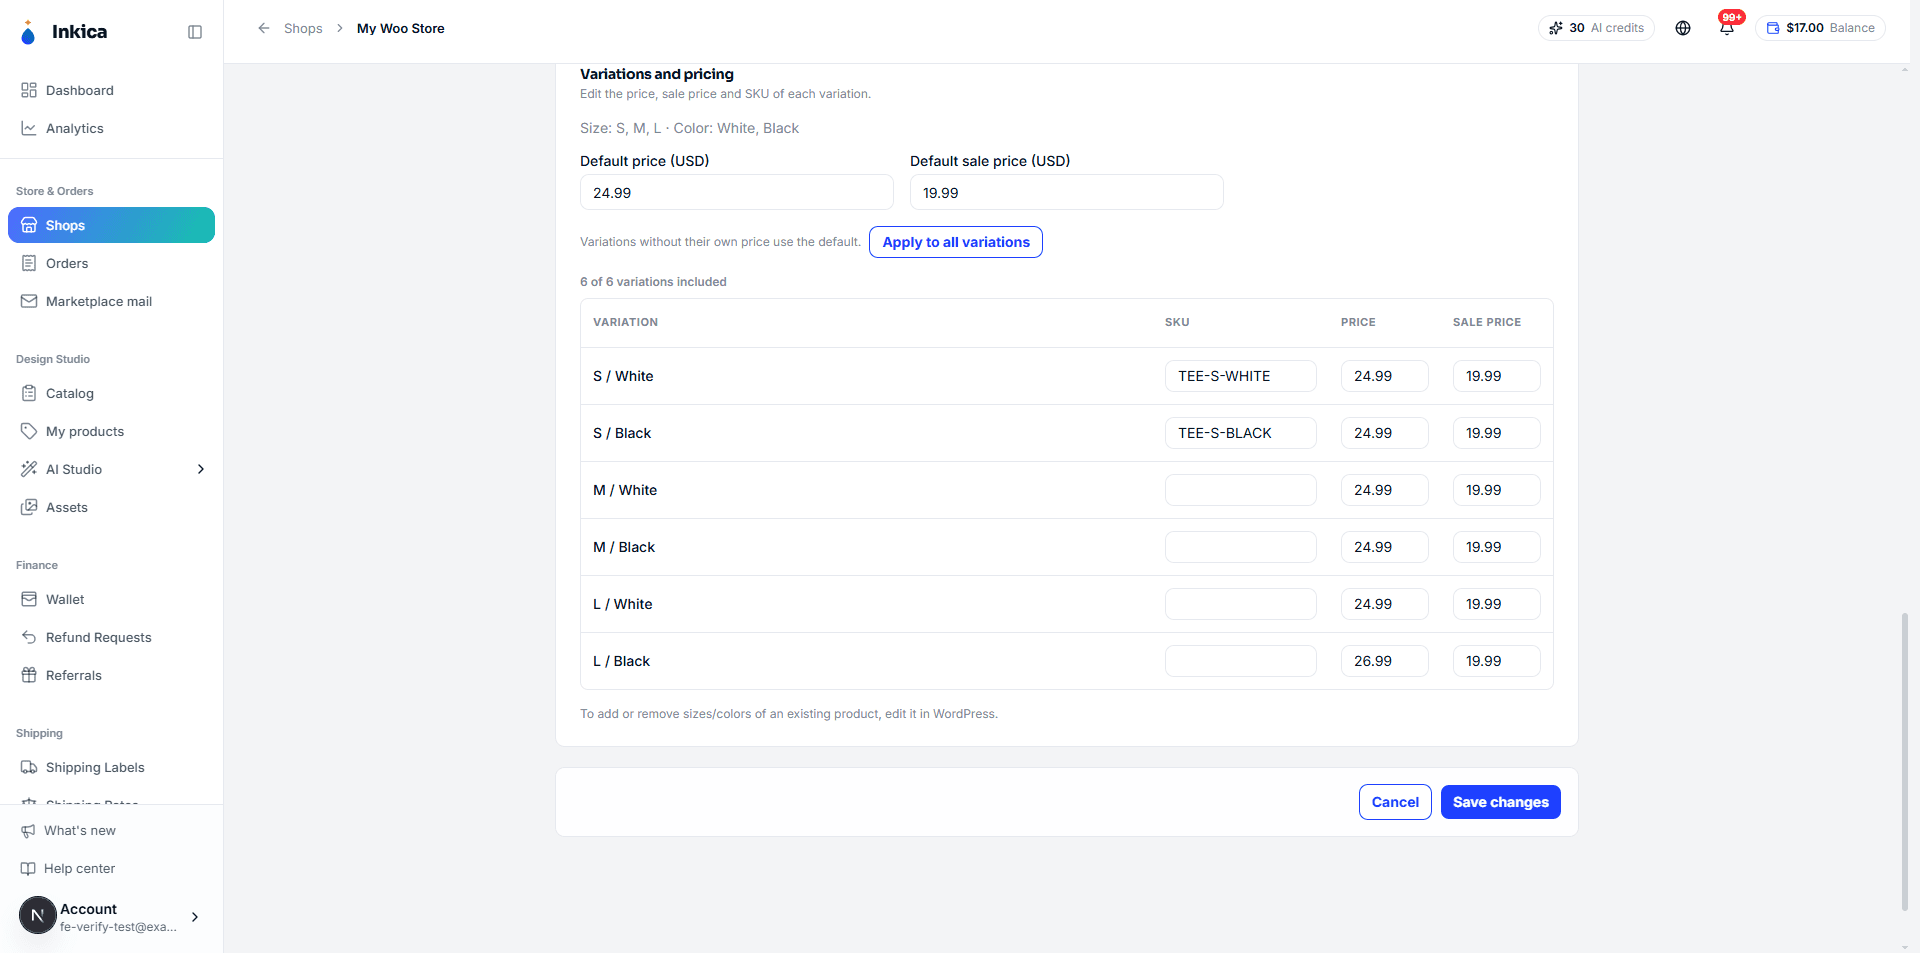
Variations and pricing: add up to 3 options (e.g. Size, Color) — every combination becomes a variation. Set a default price and click Apply to all variations, then adjust single rows (SKU, price, sale price); untick any row you don’t want to sell. No options = a single product with one price.
-
Click Create on store.
A listing made with New listing isn’t linked to an Inkica product: when its first order arrives, map the SKU once in the Mappings tab. Photos larger than 2000px are sent to the store as a smaller copy so it loads them quickly.
From my product
-
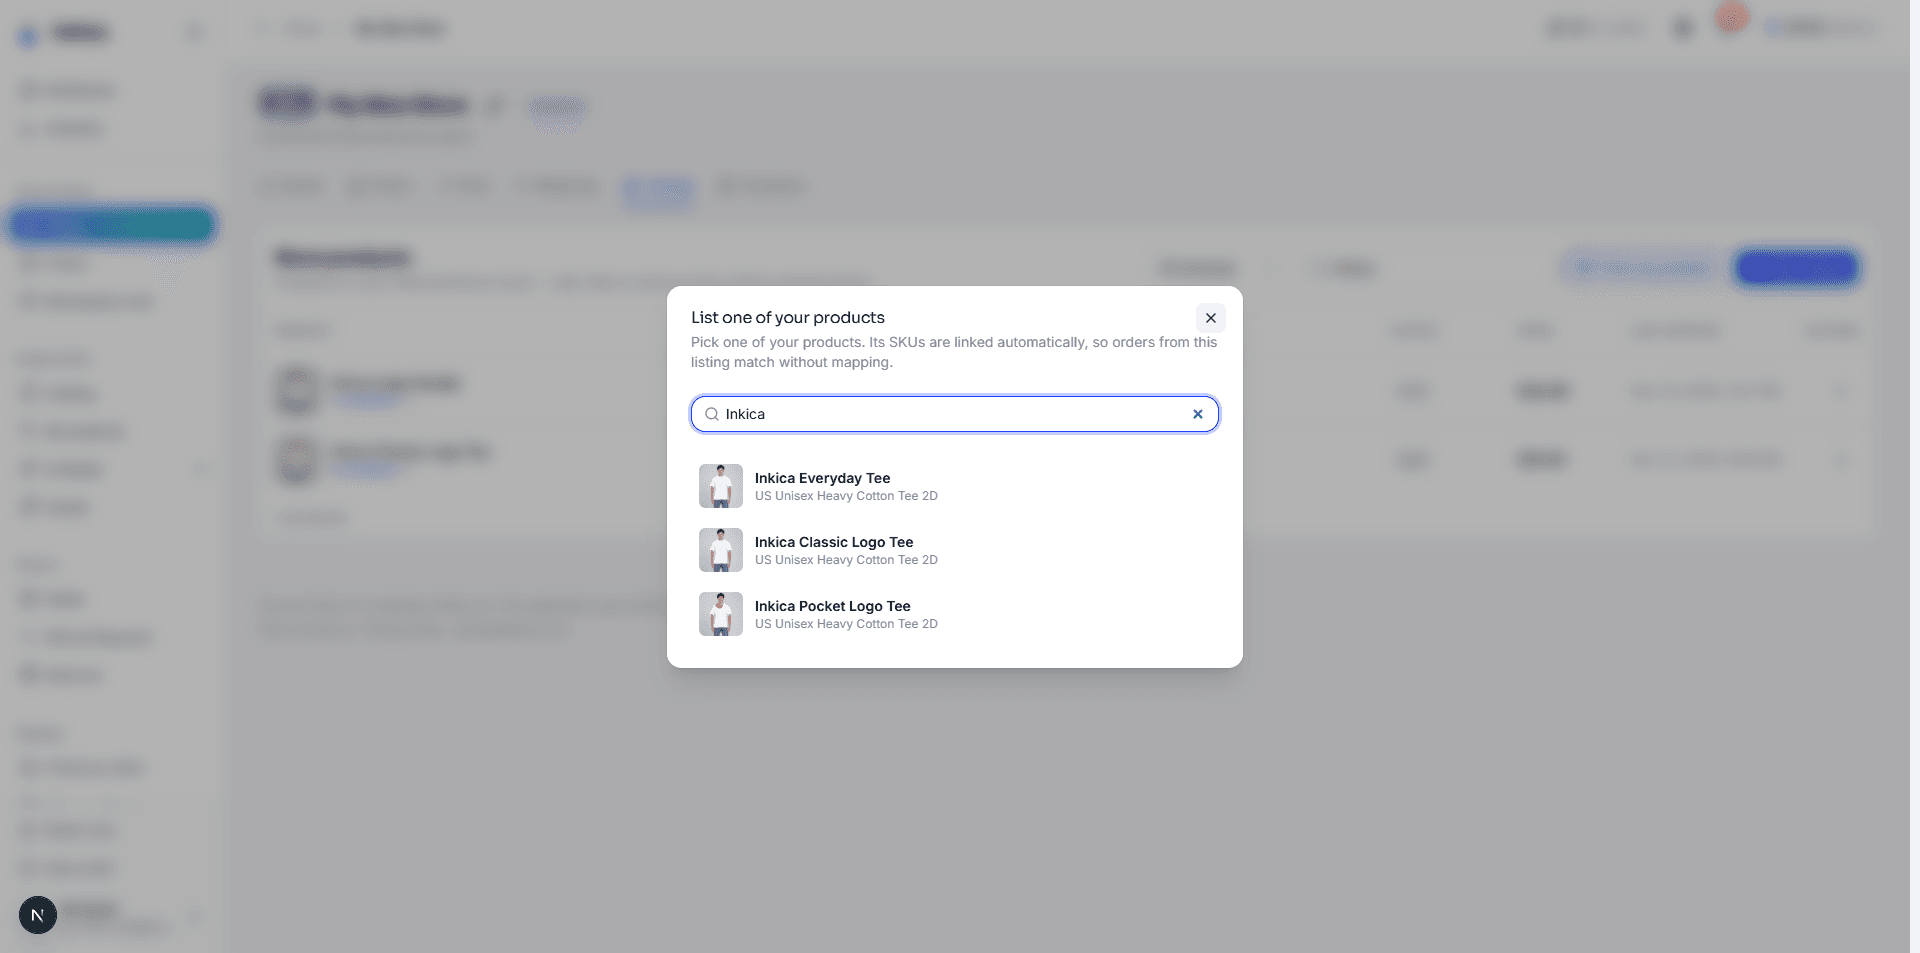
Click From my product → pick a product.
-
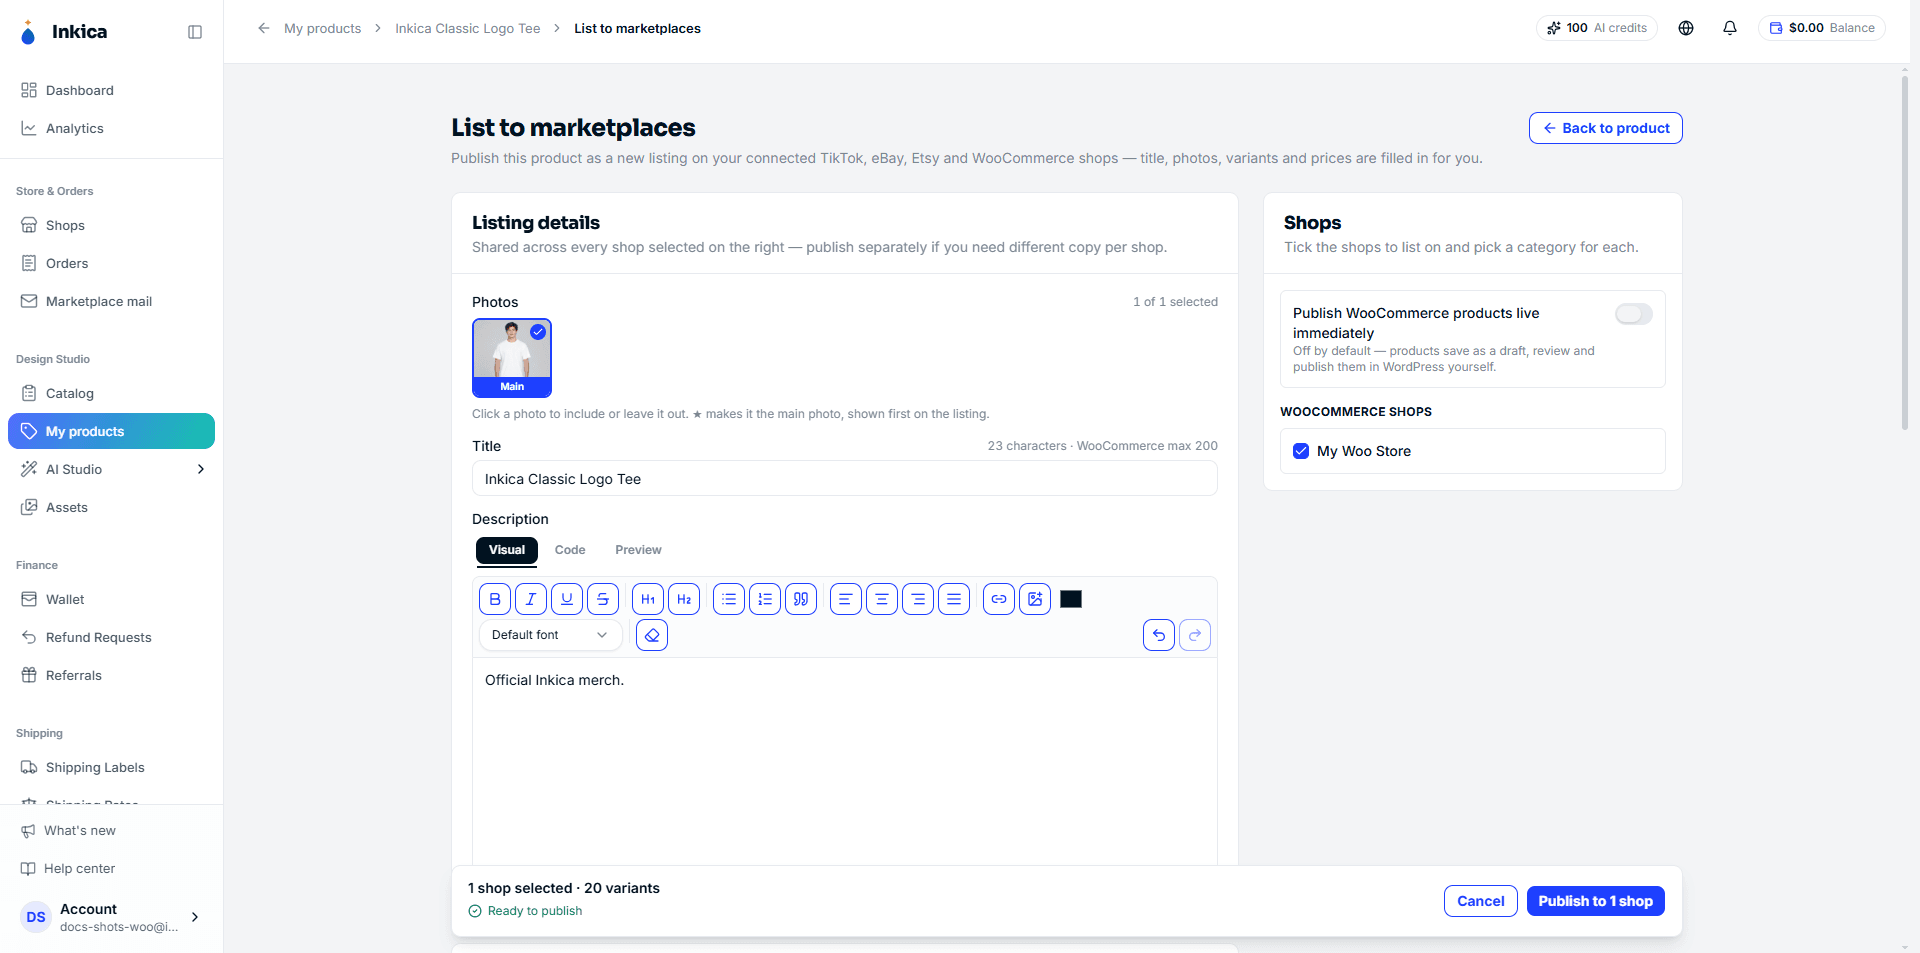
List to marketplaces opens with this shop already ticked. Check the price of each variation, then click Publish.
-
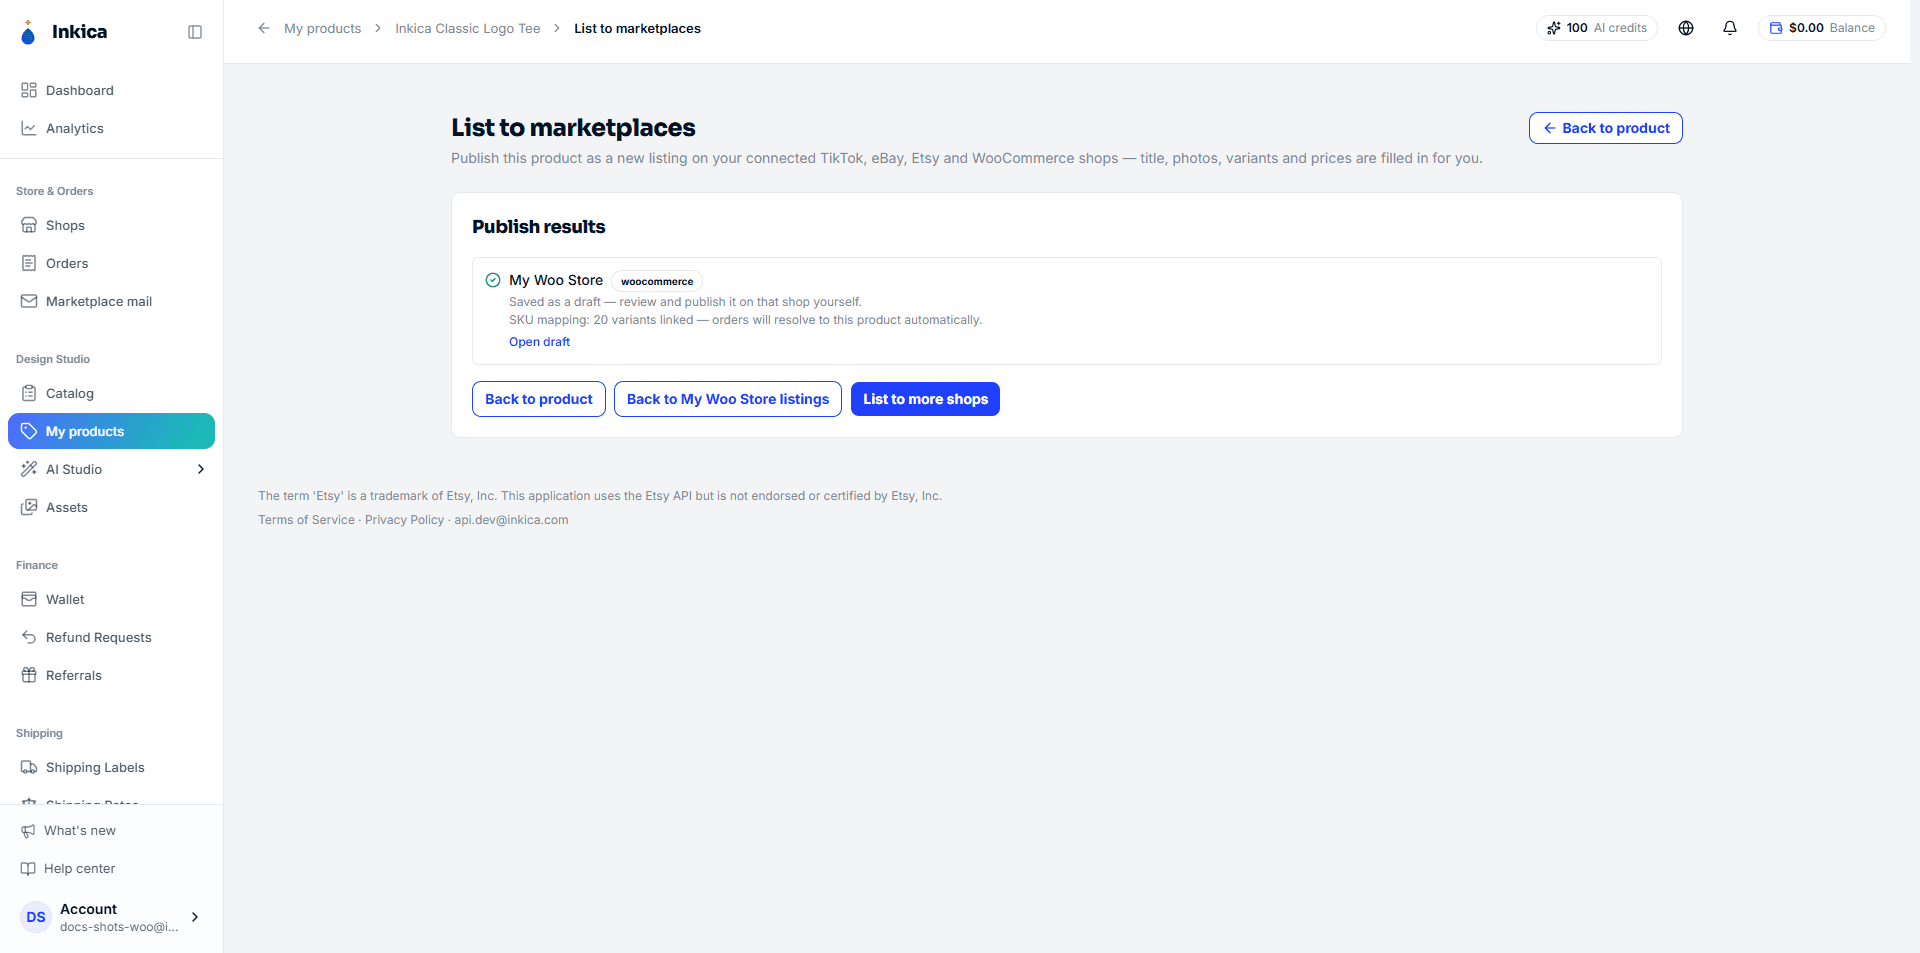
When it’s done, click Back to … listings to return to the Listings tab.
Edit, hide or delete a product
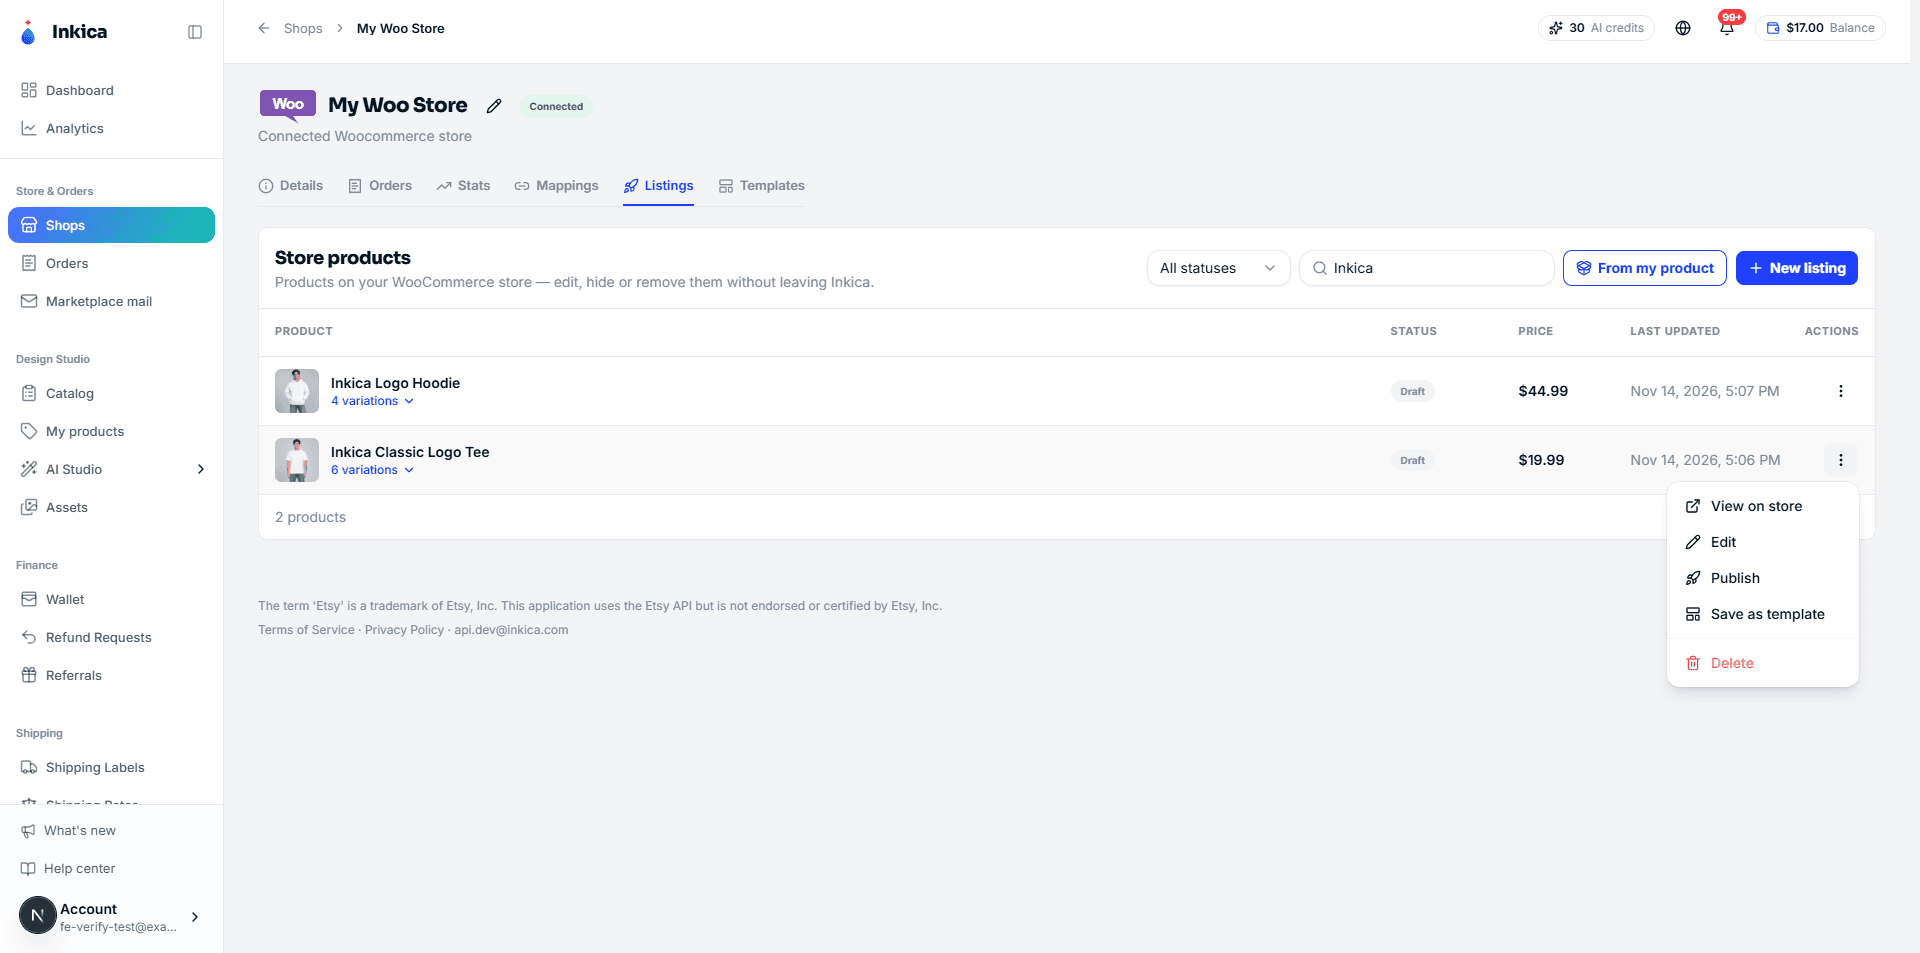
Click a product row to open its edit page, or click the ⋮ button at the end of the row:
-
Edit: the same form as when creating — change the name, description, photos, categories, tags and each variation’s price, sale price and SKU. Click Save changes; changes go straight to your store. To add or remove sizes/colors of an existing product, use WordPress.
-
Publish / Unpublish: publish a draft product, or move a live product back to draft to hide it.
-
Save as template: save this product as a template to create similar listings faster.
-
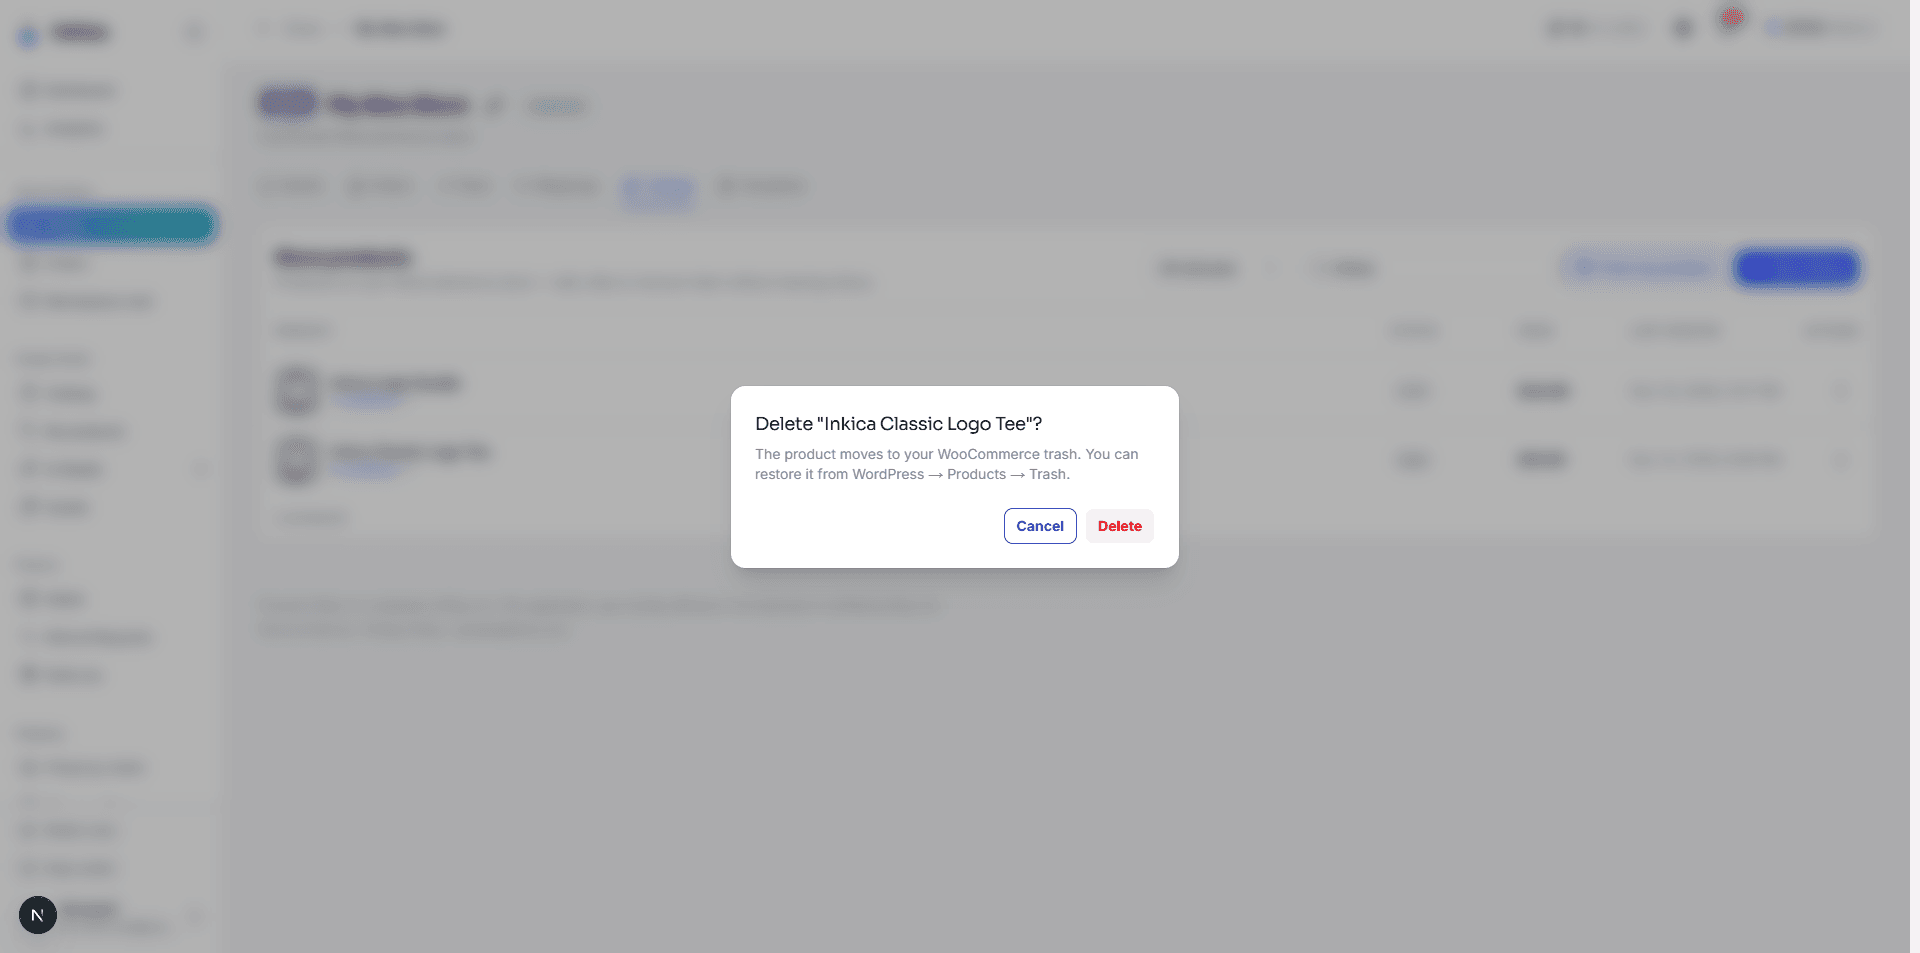
Delete: moves the product to WooCommerce’s trash — you can restore it in WordPress → Products → Trash.
Templates
The Templates tab keeps what you repeat: description, photos, categories, tags, variation options and prices. Templates are shared by all your WooCommerce shops.
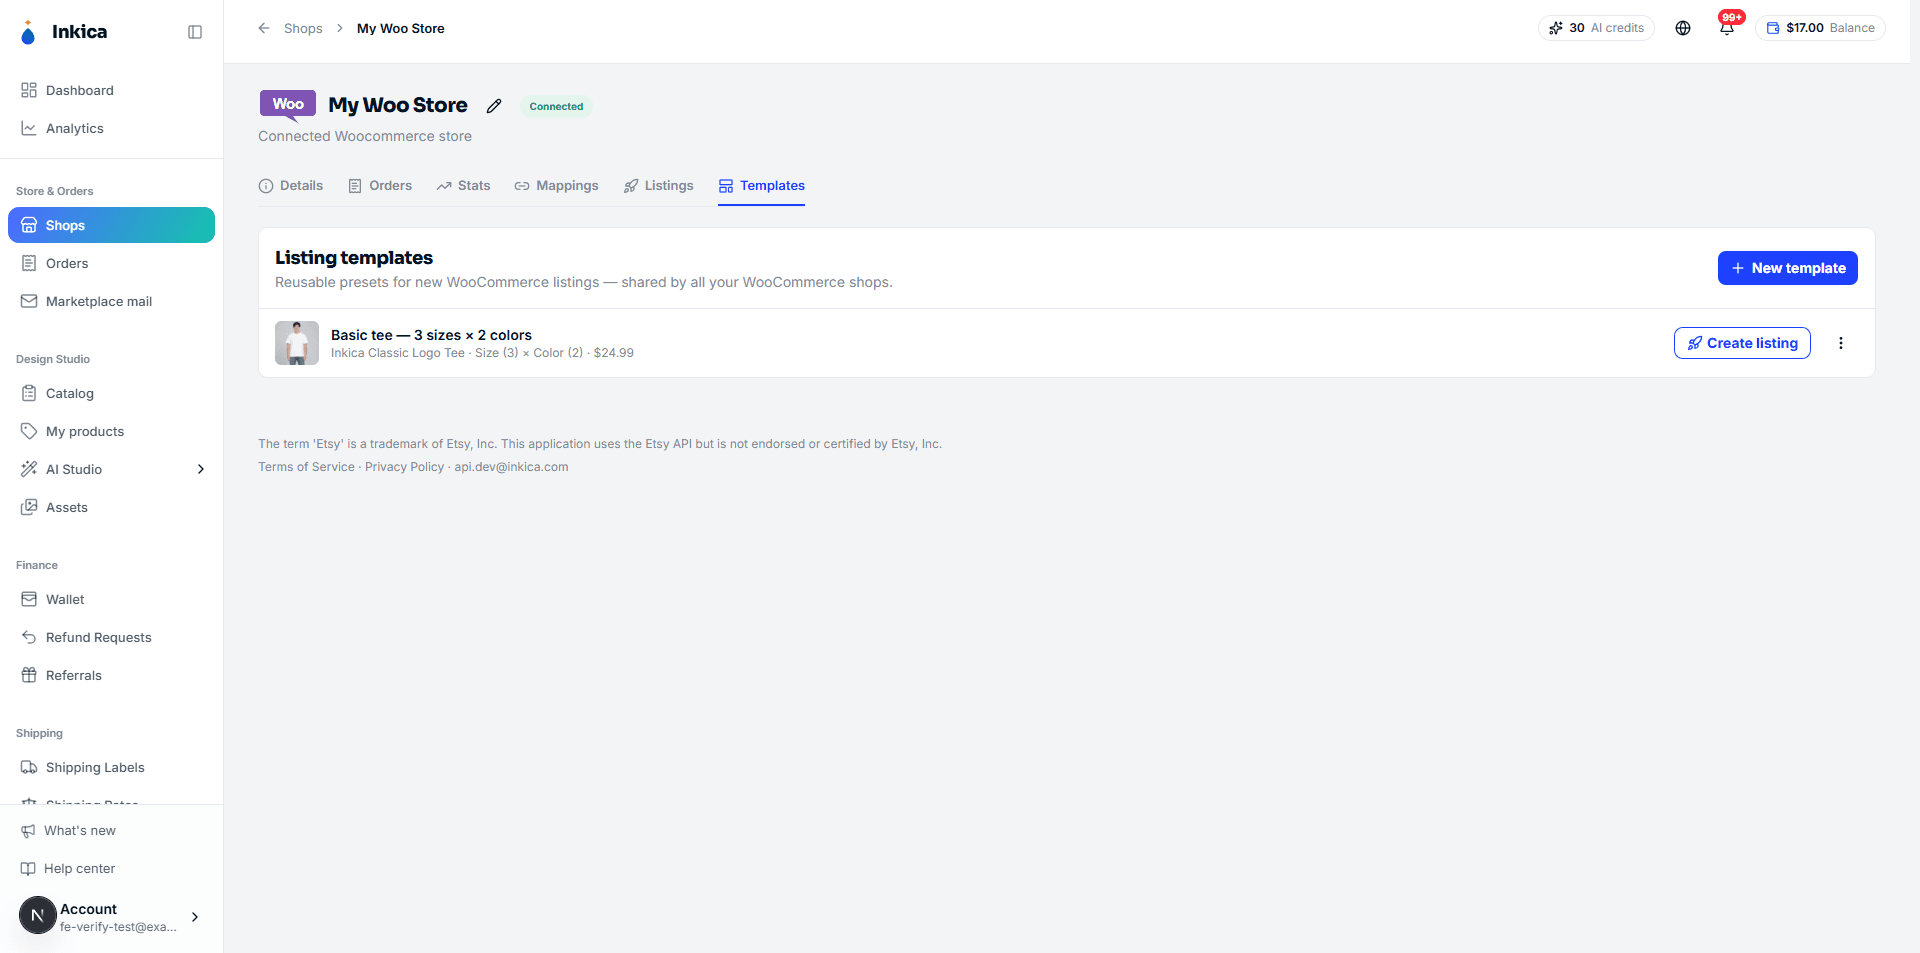
- Click New template, or Save as template on a product in the Listings tab.
- Click Create listing on a template (or pick it after clicking New listing) to open a pre-filled form.
- Categories only apply to the store the template was saved from; on another store, pick categories again.
Orders not syncing?
If the shop page says “a firewall or security plugin is blocking Inkica”: your host’s firewall, Cloudflare or a security plugin (Wordfence…) is blocking Inkica. Allow requests to /wp-json/wc/v3/ (or turn off bot blocking for that path), then click Sync again.
Disconnecting (Disconnect in Shops) removes Inkica’s webhooks from your store. The Inkica API key stays in WooCommerce until you revoke it yourself.